


Easy Lemon Balm Lip Balm Recipe (lip salve for cold sores)
I grow a lot of plants in the garden, in the polycrub, and all around the house, including in containers. This particular plant growing in this container is lemon balm, also called Melissa balm. I used to grow it in an open bed when I had the allotments, but it grew and grew and spread, and it took over the entire end of one of those beds. I learned my lesson: keep it in a container now. As spring is ushering in lots of new growth, one of the very first things that comes up in my garden is the mint family, including lemon balm. This is a really creative way to use it to make a skincare product that could help you or family members if you suffer from cold sores, but it’s also just a really nice lip balm to use on a daily basis. It’s also vegan and it’s really simple to make.
The recipe is from my book, “A Woman’s Garden: Grow Beautiful Plants and Make Useful Things.” You’ll find the recipe on page 122, and here it’s called the Lemon Balm Cold Sore Balm. It involves harvesting Melissa balm or lemon balm, drying it, making an infused oil, and then using the infused oil to make the lip balm.
Harvesting and Drying Lemon Balm
If you don’t already have dried lemon balm, the first step is to pick some fresh. It’s early in the morning, and this is the very first lemon balm that’s come up this year in spring. I’m going to pick enough to fill a bowl because once it dries, it reduces by quite a lot; the volume goes down by way less than half. I’ve rinsed the lemon balm leaves in cool water and drained them so that any insects that were on the leaves have a chance to get back out into the garden.
Now, I’m just going to spread the leaves in my food dehydrator. This is probably the maximum amount of leaves that you want in a single tray in a food dehydrator. You want plenty of airflow so that there’s air circulating all around and that the moisture can evaporate out. I’m just going to put the lid on here and then turn it on to 40°C and put it on for a couple of hours, and then I’ll check afterwards to see if it’s all dry.
After just two hours, the leaves are fully dried and you can hear how crispy they are, but they’ve also retained their green color. Oftentimes, when you’re drying plant material in the air or if you dry it in the sun, it will zap it of all the color and a lot of the goodness in the leaves.
Making the Infused Oil
Making the infused oil is really simple and it doesn’t have to be exact. Basically, you start with a container of your choice—this is just a small jam jar—and you fill it halfway to all the way loosely with dried leaves, the dried lemon balm leaves. Next, you pour over your choice of carrier oil, so a liquid oil like sweet almond oil or olive oil, and just fill it up almost to the top; just leave a little bit of headspace.
With the jar filled and sealed, we’re going to give it a little bit of a shake and then we’re going to put it in a dark place that’s quite warm. We’re going to leave it there for a couple of weeks, returning to it every now and again and giving it a shake. You could use the infused oil right now, but optionally, you can make an even stronger infused oil by straining the oil from the leaves now and then putting the infused oil back into a clean jar with lemon balm leaves and leaving it to infuse again.
When the oil has finished infusing, it’s time to strain it again, but this time you want to pass it through a sieve and a cheesecloth. The cheesecloth will help to hold back any little bits of leaves that might pass through the sieve. Pour all of your oil through, let it drip, and then at the end, you want to pull up the cheesecloth and give it a really good squeeze.
Creating the Lip Balm
Once you have the lemon balm infused oil made and measured out, the rest is very, very simple. In fact, there’s only one other ingredient and it’s called candelilla wax. It’s vegan and plant-based, but if you don’t have this, you can also use beeswax. I have my ingredients ready. I also have five lip balm pots sitting out and ready to be filled; they’re stainless steel.
The first step is melting the candelilla wax, and we want to do that on really low heat. I’m filling a small saucepan with maybe about an inch of hot water from the kettle and I’m going to float another pan inside. This gives indirect heat, and so the candelilla wax will melt at a gradual temperature rather than being exposed to the hot heat from the hob. I’m going to watch it until it’s completely melted and then take the pan off the heat.
With the candelilla wax melted, the next step is adding the lemon balm infused oil. We just pour it straight into the pan. You can see that the wax has started to solidify a bit, and that is because this oil is room temperature. So what we need to do now is scrape out all of the oil and then we’re going to return this pan to the hot water to melt. The hob is turned off, but once the pan is floating back in that hot water, that residual heat will help to melt the oils. It’ll take a minute or so, so just keep moving the oils around in the pan and eventually they’ll all melt again. If you wanted to add essential oil, you can add it now—three drops—and stir it in really well.
Benefits and Uses
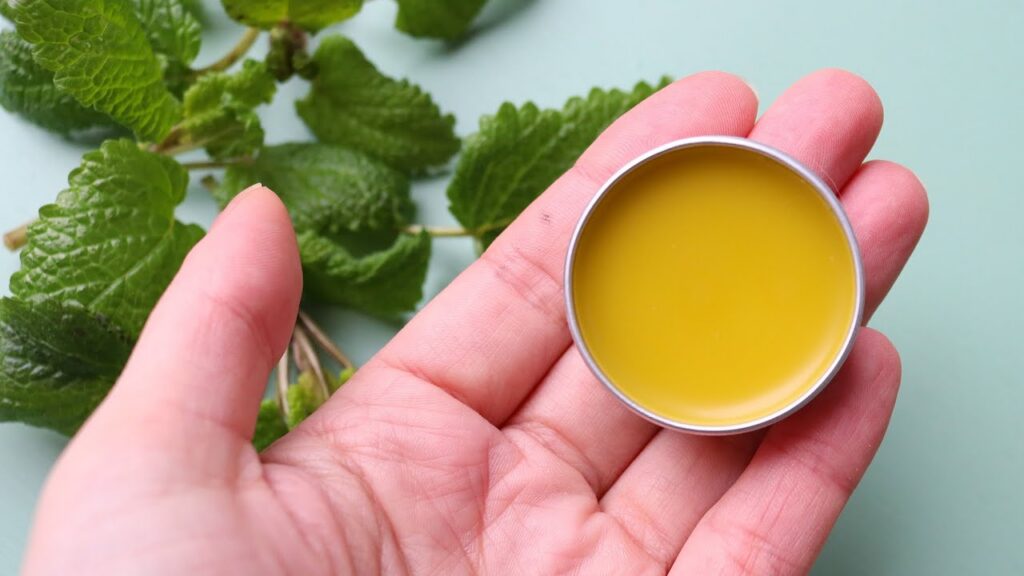
This lip balm is brilliant. It’s firm but slides off nicely onto your finger and feels very silky. It’s great as an everyday lip balm, but again, if you do suffer from cold sores, the lemon balm in the infused oil that is within the lip balm can help to speed up the healing of those.
This recipe is in my book and it sits alongside loads of other ideas and recipes for using things that you can grow in your garden to make herbal products like skincare and handmade soap, simple herbal remedies, natural dyeing, beautiful food recipes, and so much more. If you would like to get your own copy, you can read reviews and get a copy of my book. Thanks so much, and if you would like to check out some more ideas, I have some other skincare recipes and also some soap recipes.